

All project wide configuration options can be accessed by any user with administration rights to that project via the “Manage Projects” option available from the settings page.
The settings page is accessed by clicking on the gear icon at the top right of the DCM dashboard and will look something like this for a user with access to all features.
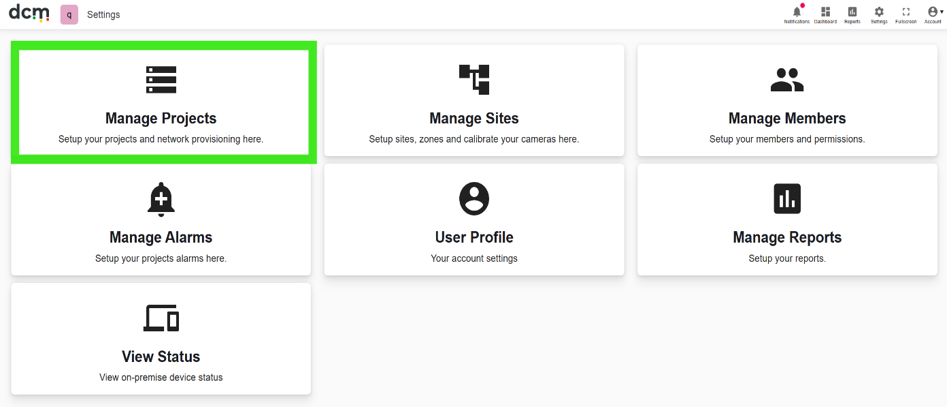
In Manage Projects, the authorised user can create a new project, view project details or jump to that project’s dashboard. Users can also invite another user to the project or clone a project.
From this page, project admins can also control key systems affecting all cameras or data within a project, arranged in to tabs by functional area.
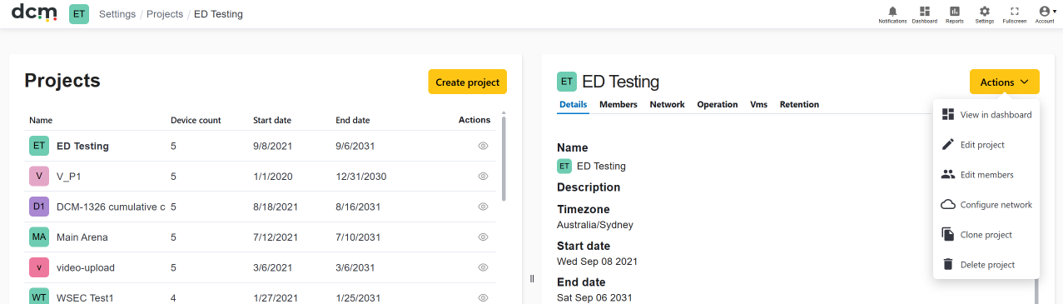
Admins can view, edit, clone or delete projects via the actions menu at the top right.
The Main Project Configuration tabs are described below:
View Project Details
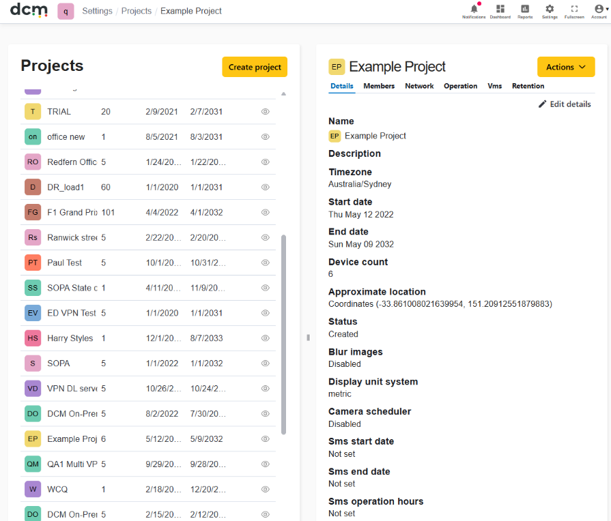
The first Project Details tab also includes useful project wide settings such as the ability to blur all camera sample images for that project for enhanced privacy protection, set project wide limits on camera or SMS alert features or enable the camera scheduler. More information on how to set camera schedules is detailed later in this section.
Internationalisation:
DCM supports metric or Imperial / US units. The Project details sections has a master switch that will change the units on Dashboard displays, graphs, reports and configuration panels.
Members
The Members Tab allows Authorised domain Admins to add or remove users from a given project.
It also allows changes to the role of each user for that project.
A member set to the default “user” level of access, can view the projects dashboard and run reports, but does not have access to configuration controls. Members set to the “Admin” role – will have configuration control access for the currently selected project only.
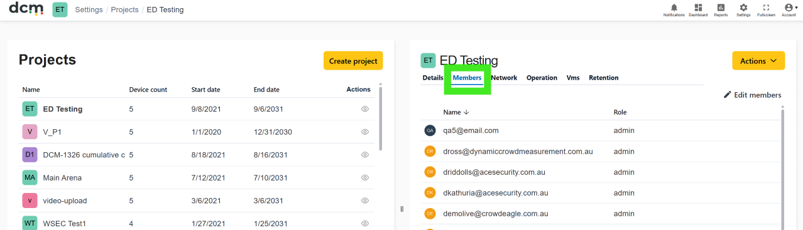
This tab only adds and removes users from the currently selected project and changes their access rights to that project. The details of a users actual account can be viewed and edited using the previously described “Manage Members” page.
Network
This is the main setup screen for VPN connections for the default cloud based version of DCM.
Read the Network setup section for more details.
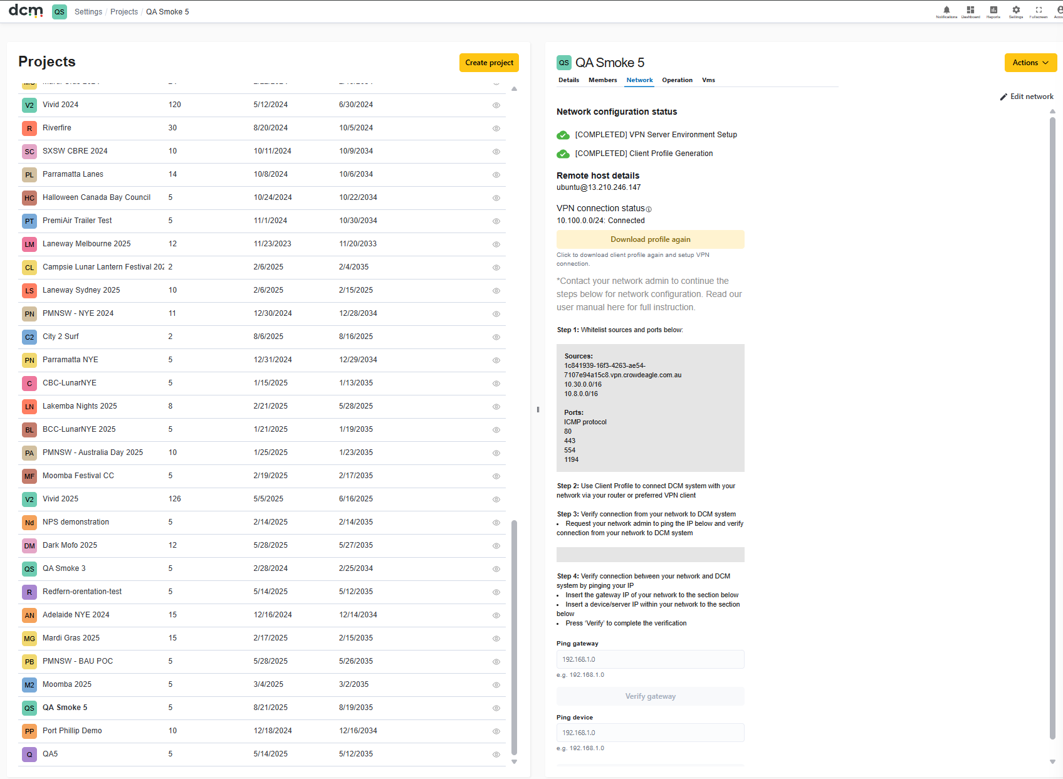
This page displays useful information such as the status and IP address of the cloud based VPN server (if present). This information, as well as the ports used for the VPN link may be useful for network administrators to set up firewall rules on the client site network if needed.
This page also allows IP addresses on the local network to be ping tested to verify if the link is active.
Only cloud projects generally will use this page. Each cloud project has a unique cloud server deployed for that project only using a dedicated VPN link to ensure security.
Scheduling feature
DCM includes a full scheduling feature. This allows a customer or venue to only operate DCM camera analytics when events are actually on, and save on running costs.
This only affects the DCM analytics engine and dashboard. Control of your actual camera operation times for use in your existing VMS or security software will not be affected.
The Scheduler feature is configurable via Settings > Manage Projects > view project (eye icon) > and choose the ‘Operations’ panel as seen below.
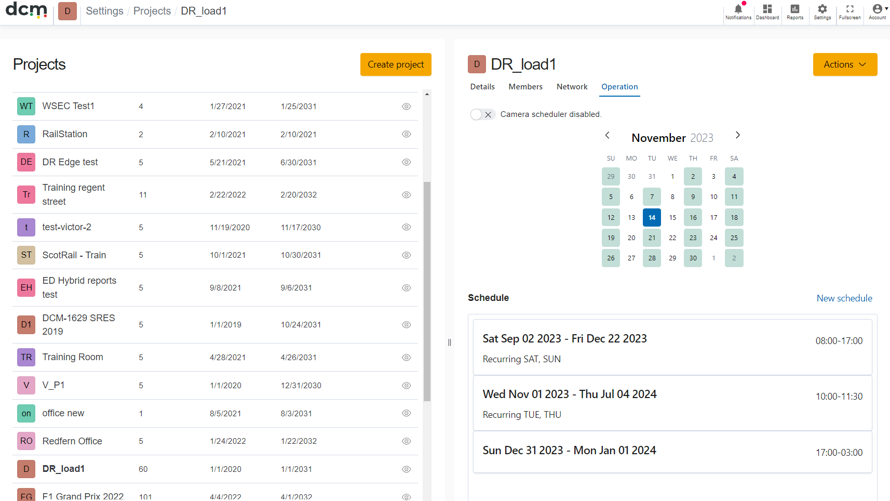
While the base camera deployment configuration page on each camera, does have a basic operation time feature that allows restrictions to daily start and stop times, this scheduler allows much more detailed control, for all cameras in the project at once.
When the toggle at the top of this panel is activated, the individual camera time settings are overridden and all cameras will follow the pattern set here.
Cameras can be set to operate on a recurring weekly schedule, or for specific future dates. Multiple schedules can be operational simultaneously.
The calendar tool shades days that the cameras are currently set to operate.
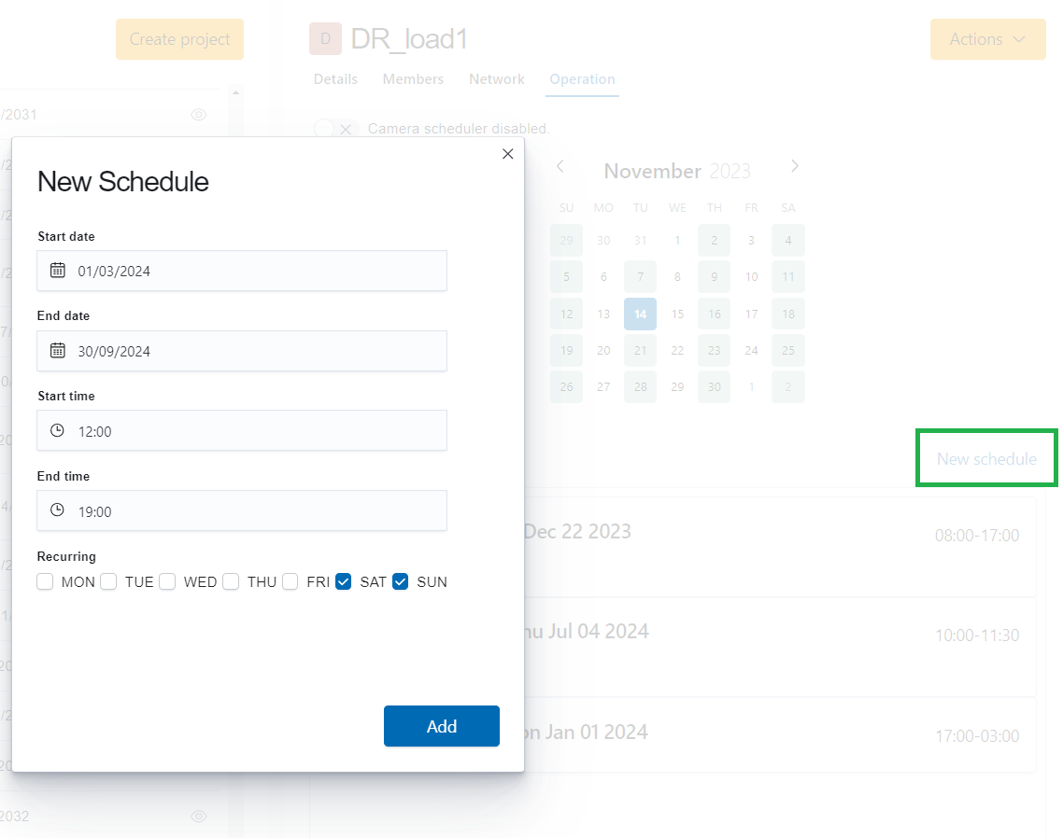
To create a new schedule, click the ‘New schedule’ button on the right side of the panel.
To create a one off schedule for a specific future event, just select start and end dates and times and click ‘Add’. DCM analytics will start and stop once at the given times.
In situations where crowds are expected at regular intervals, the ‘recurrence’ option can be used.
For example for a sports venue that hosts events every Saturday and Sunday afternoon for a given sports season, a recurring schedule could be set up something like this.
VMS integration
For some specific VMS systems, DCM offers some additional features and tighter integration with the native management consoles.
This tab enables the initial setup of the connection between DCM and your existing VMS system.
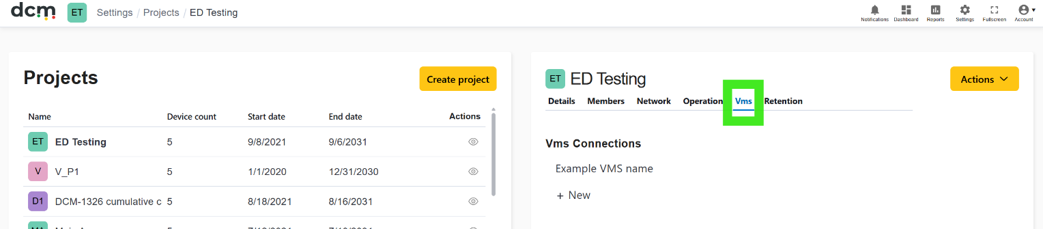
Which specific VMS systems are supported, and the detail of extra features available, are covered in Appendix 2 of this manual – which is also available as a stand alone VMS integration guide.
Data Retention Settings
The “Retention” Tab, controls automated deletion of images of data for the currently selected project.
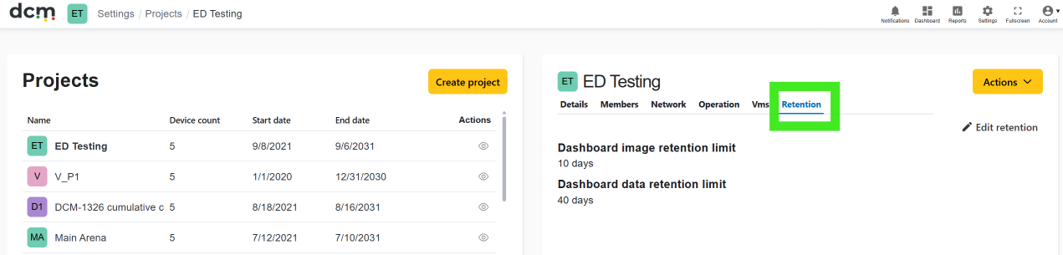
To comply with local privacy legislation, such as GDPR in the EU, or other privacy requirements for a specific event or client, this Tab offers the option to set a number of days, after which DCM dashboard data is automatically deleted from cloud data stores or in the case of on-premise systems the local storage system, and will no longer be available to view by users.
“Image retention Limit” setting will automatically delete sampled camera images shown on the dashboard for that project older than the set number of days.
Note that the image “Blur” feature, available from the Project Details Tab is an alternative method to comply with privacy requirements, and prevents the display (but not storage) of clear camera images that may identify individuals, while preserving some context to the data presented.
“Data retention Limit” setting will automatically delete all data shown on the dashboard for that project older than the set number of days. This data is primarily the aggregated density, flow and mood numbers shown on the dashboard graphs and is inherently anonymous by nature. Therefore this setting may be driven more by storage capacity preferences than privacy requirements.
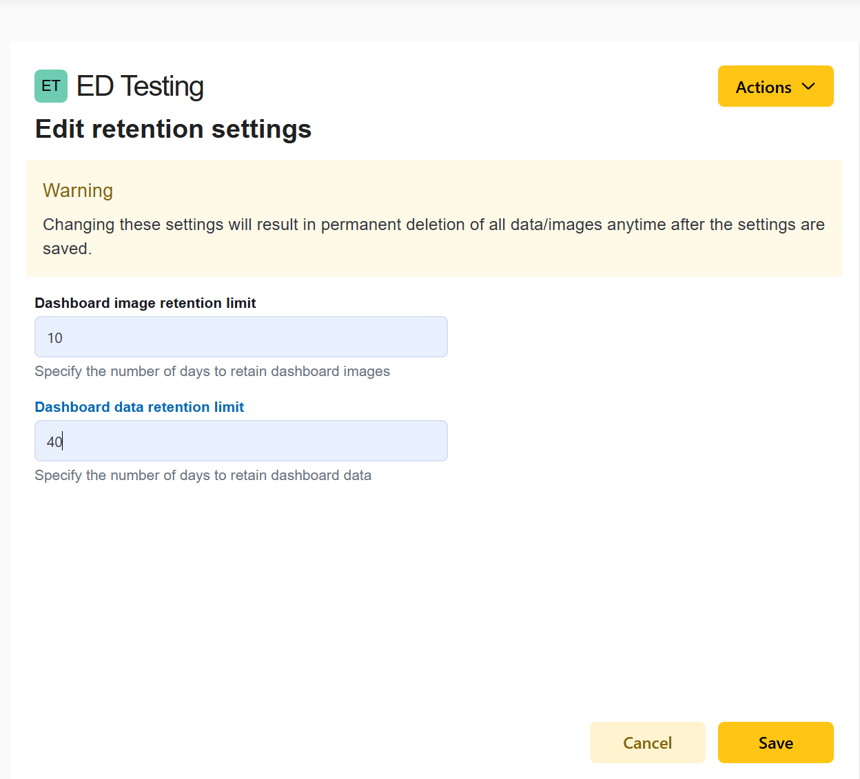
Data deletion is done by a timed job – it may take up to 24 hours for existing data to be removed.
Once deleted, the process cannot be reversed.