

The DCM setup process is designed to be completed by the end user. No specialist knowledge is required, other than a basic understanding of the site to be monitored, and the details of the cameras to be used and basic setup of the local network.
The DCM team can however, if required assist with this process, or pre-configure a project for use.
In most cases the DCM team will create at least one administrator level user and send the details to you.
Each DCM deployment is set up using a project structure. The project is the container that allows configuration for all users, cameras and data relevant to a distinct site or event.
A Project can be created from the Settings page and choosing the “Manage Project” option, then ‘Create Project’
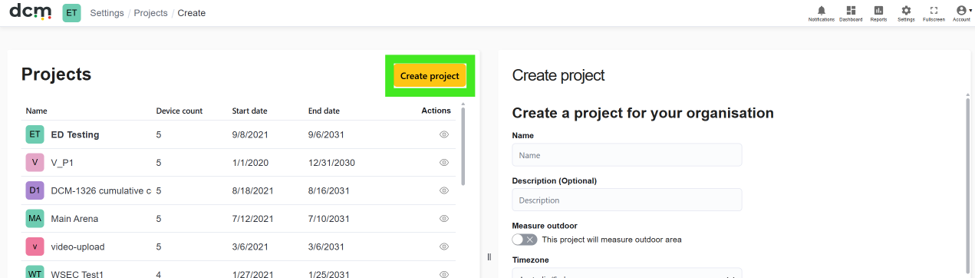
Three Steps to create a project:
-
Project setup: provide a project name and base details and set up users.
-
Create a network (VPN link) for the project.
-
Site setup and Calibrate cameras.
Project setup
Users will need to provide a project name, project start/end date and estimate the number of devices used in the project.
Measure outdoor / indoor
If indoor only is selected, the user will not be able to use the satellite map to locate the camera.
Start date / End date
DCM will only collect data during this period of time. Ensure this date is sufficiently in the future as camera drivers will not operate past the end date. It also affects behaviour of Date pickers when reviewing historical data.
Device count
Providing an estimate of the expected number of cameras allows the configuration logic to scale for the expected number of connections.
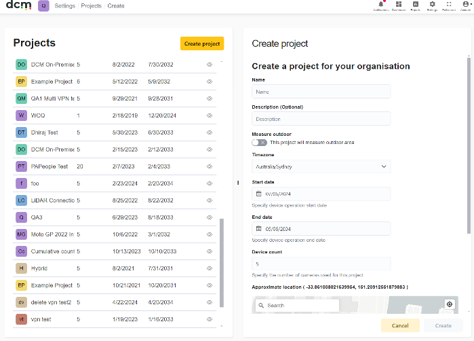
Project Location
Place a pin on the map to indicate the location of the main site.
The map has a search location to assist placement.
After these details are entered, pressing the yellow “Create” button at the bottom right will create the project.