
So that the measurements and results are accurate please ensure that all steps are followed as described. Failure to properly calibrate the system will result in the data being compromised.
Site and Zone set up
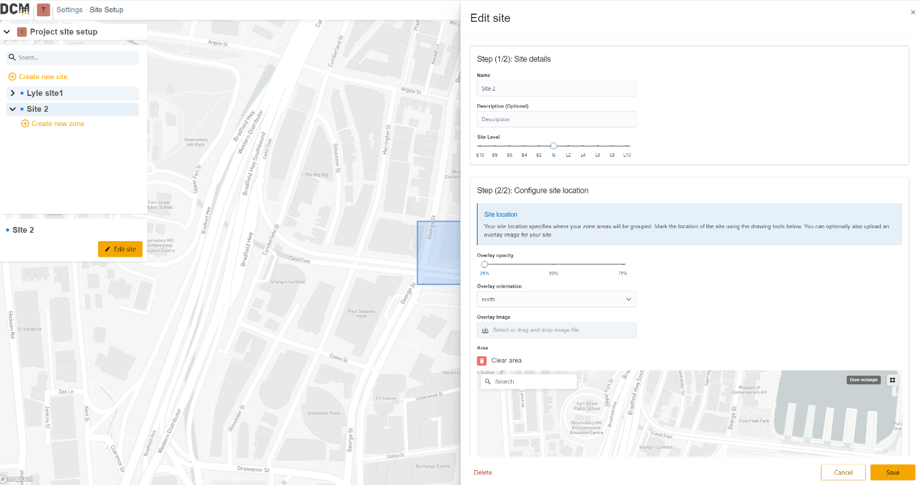
First Create and define the site in which the intended cameras are operating. You can do so by naming the site and then use the drawing tool to draw a rectangle on the map indicating the operational area. The drawing tool is located on the top right corner of the map in Step (2/2), ‘Area’ section.
Left click on the tool icon to start drawing. Left clicking on the map will set your first point. Clicking on the same point twice will exit draw mode.
A site is the high level boundary of the area under observation. Site boundaries are not critical, and are only used as a container for other data. If your venue has multiple levels, with cameras on each, you will need to set up a site for each level. Set the level in the details section at the top of the page.
All zones will need to be located within the site.
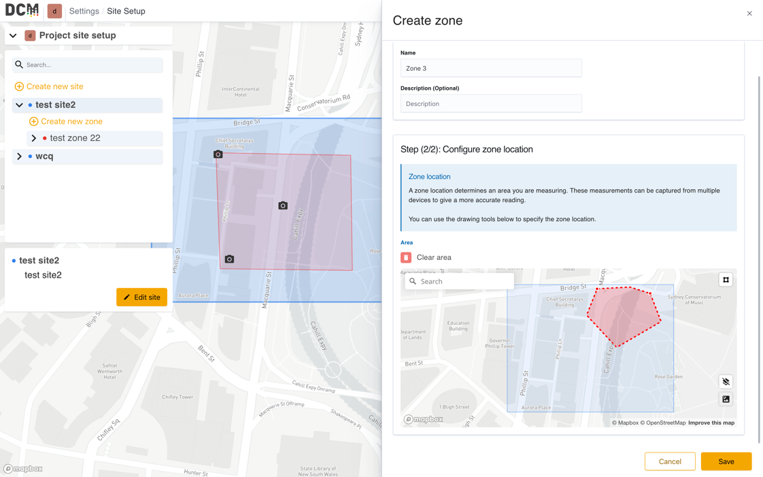
Once a site is set up. Click ‘create a zone’ at the next level of the menu on the left. A zone is the area that will be captured by the camera(s). Create a zone within your site, the process is the same as creating a site, however, the shape of the area can be a polygon. A site can have multiple zones. Each zone can have more than one device or camera deployed.
Click the drawing tool in the top right corner of the map, then click on the map to set each point. Clicking on any point again will exit draw mode.