

The most critical steps for calibration are:
-
Defining the area being measured with the polygon drawing tool.
-
Accurately matching up the landmark pins between the overhead and camera views.
-
The next pages will describe the calibration steps in detail, but in general.
-
When defining the area, simple shapes are best.
-
For small areas Landmark pins work best as close to the center of your area as possible.
-
For wider views, a more evenly spread distribution of pins can be useful, but if possible the majority should still be fairly central.
-
Landmark pins work best in a grid or regular pattern.
Try to plan in your head where your boundary/mask line is going to be. In some camera views it is the obvious floorspace where people can walk, but it may be a smaller sample area of interest.
Our drawing tool will enable you to define an area in any shape. But simple shapes like rectangles will minimise the chance of error. Use the simplest shape that makes sense for your location. Leaving some gap between the area you define and the true edge of your space (such as a wall), can also be helpful. Slightly under-estimating the area is better than including walls or part of the horizon in your defined area. DCM will detect people even if they are only partly visible in your defined area.
Once you have planned your intended measurement boundary, it is very useful to get a rough idea of its area if possible. This will allow you to quickly assess the accuracy of a calibration at a high level, and quickly identify when pins are misplaced, causing large calibration errors. If you have someone on site, pacing out the area is a simple way to get a rough estimate. Where plans are available, these of course can provide a guide.
Getting the measurement between any regularly spaced features in the scene, such as floor tiles, fence posts, wall sections, car park spaces or road markings can be extremely helpful for both estimating the total size of the area of interest and placement of calibration pins.
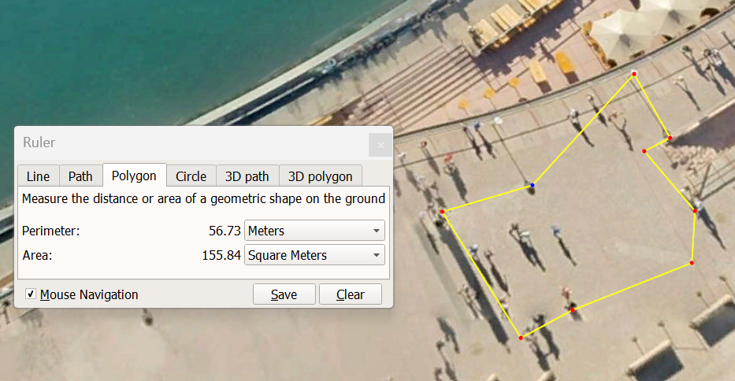
For outdoor areas, freely available tools such as Google Earth Pro, have measurement tools allowing estimates even of irregularly shaped areas that can give a useful high level estimate of the area you are interested in.
While six is the minimum number of landmark pins required, placing at least a dozen will give you a significantly more accurate calibration. Landmarks in the center of the view are generally better than ones in the corners or edges, unless the view is very wide.
Also note that depending on light conditions, camera resolution and height, there is a limit to the distance that detections will be reliable. You should not extend your calibration mask area too far into the distance. As a rough rule of thumb, the far boundary of your defined area should not be more than 250 meters from the camera.
Likewise, there is a lower limit to the area DCM can effectively calibrate.
As a general rule of thumb, the masked area of interest needs to be more than roughly 12 square meters. The calibration system will warn you if your area is too big or too small.