

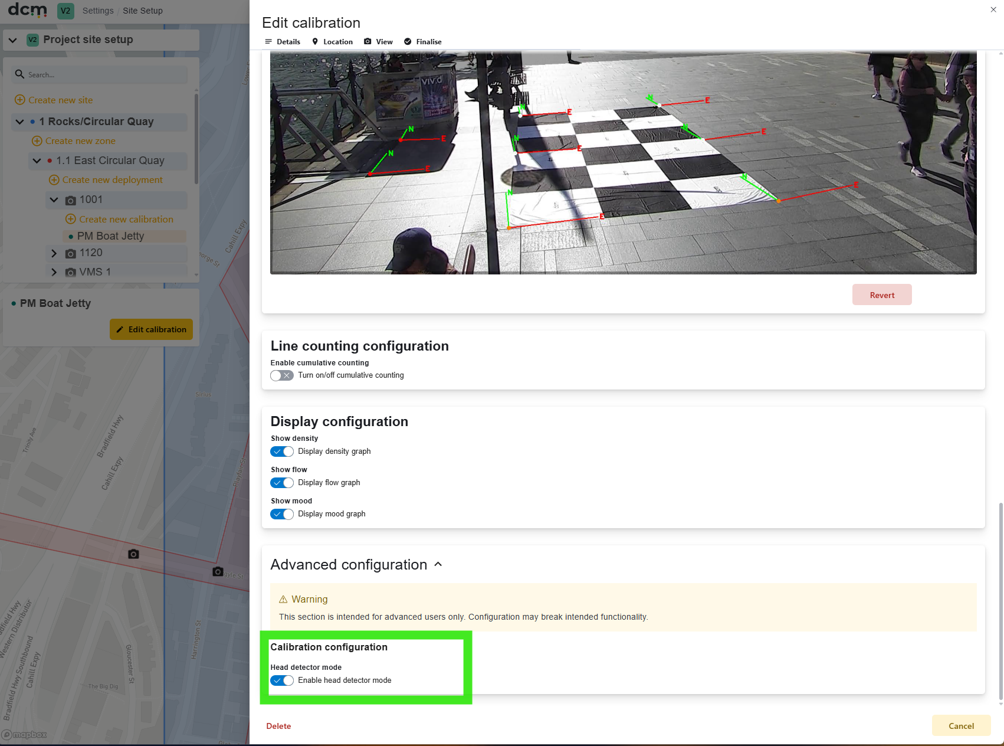
There are some extra configuration options available from the Camera Deployment or Calibration pages. The following options can be set for individual cameras.
📸 Choosing Full Body or Head Detector Mode
Optionally, the user at this point also has the ability to choose between detection models for this device only. Users can choose between a model that uses the full body or the head only. These options are discussed more fully later, but in general, for dense crowds, where people are likely to be partially occluded, enabling Head detector mode is recommended. Full body detection is the default, and best for sparser crowds and flow detection. Mood data is collected in either mode.
Note that neither model uses facial recognition or tracking of individuals.
🚶 Pedestrian Detector Mode (Full Body)
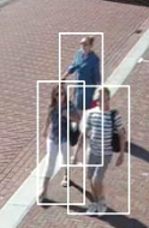
The default DCM analysis engine primarily uses a whole body detection method referred to as ‘Pedestrian Detector mode’. This mode can sometimes give more accurate flow information, but cannot cope well with dense crowds, and is therefore not generally recommended unless it is expected a camera view will remain sparse. In this mode, detections are visually highlighted with a white box around the visible part of a person.
👤 Head Detection Mode
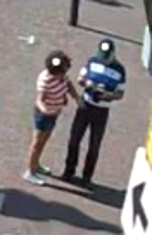
Alternatively, the software can use Head Detection mode to identify a person. This is to maintain good density detection accuracy even in crowded situations where many people may only have their head, or even part of their head visible to the camera. When in this mode, detections are visually indicated with a white dot.
Detections using ‘Pedestrian Detector’ mode
Vs. ‘Head Detector' mode.
concealment Hiding Elements from the Dashboard Display
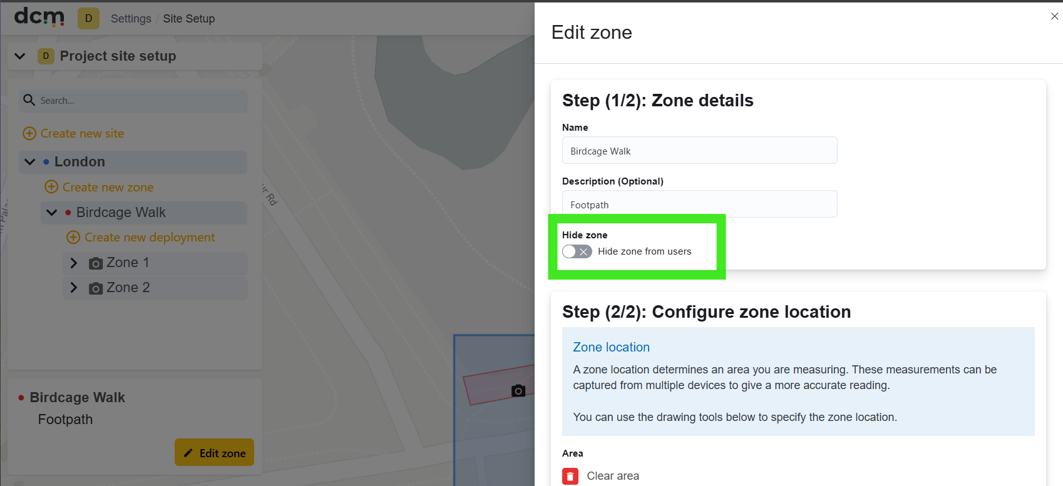
Optionally, the user has the ability to hide either an entire Zone, deployment or specific scene/calibration as well as the individual graphs.
Within the Manage Sites menu, each level of the hierarchy – Site, Zone, Deployment and Calibration – has a slider to hide this element from visibility to all users on the main dashboard.
If enabled, this will hide the selected element, and all its children.
📈 Hiding Graph Data
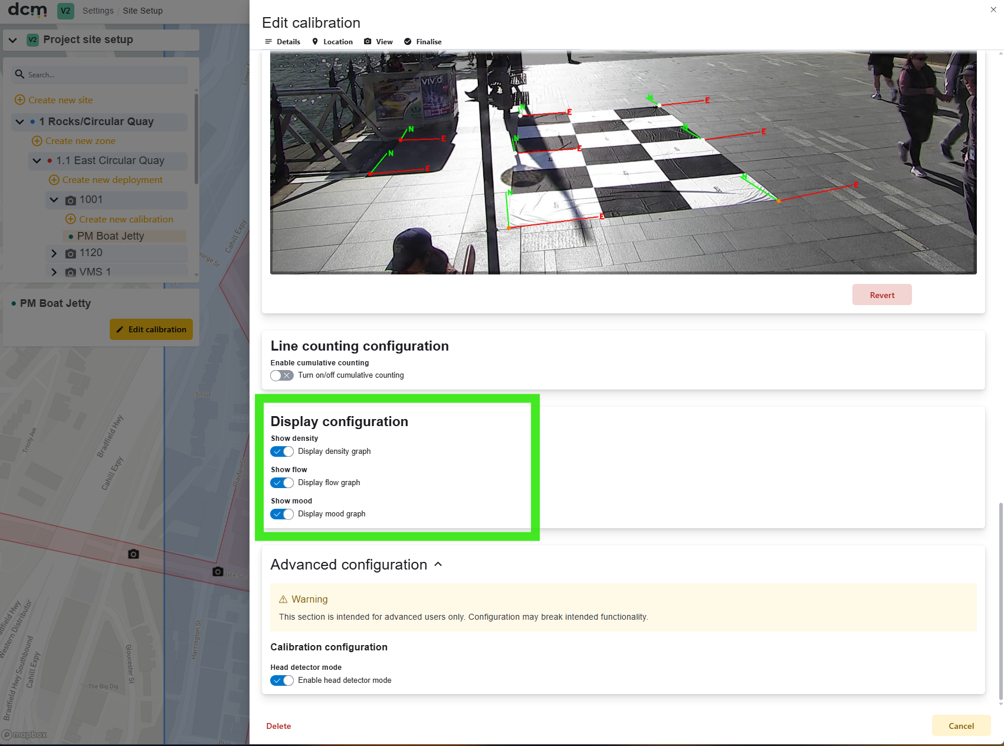
From the calibration screen, you can also hide Density, Flow or Mood graphs (or any combination) for this calibration using the sliders. This option does not prevent data collection, only display.
In some rare situations, one of the main displayed data graphs may not be relevant, or its data may be compromised. For example, if a camera is too far away from the subject to provide reliable mood data. In such situations, an option exists to hide any combination of the three main graphs for Density, Flow or Mood, in order to avoid displaying misleading data.