

The first steps to connect VMS managed cameras are identical to general DCM setup.
🔗 VMS API Connection Requirements
Connecting to a VMS API does not replace the need for a valid network connection from DCM to the VMS host machine. This connection can be established either via a VPN tunnel, if using the standard cloud version of DCM, or alternatively if using the On Premises option, by having DCM running on a local machine with access to the same internal network as the host machine of the VMS software.
Ingestion of camera frames to the DCM AI analysis engine is still done using this secure VPN connection.
The additional API connection can however add functionality, enable tighter integration between the two systems, and make the process of adding cameras to DCM quicker and easier.
See the “Creating a Project” section of the main manual for details on project and VPN setup.
As noted in that section, the three main steps to set up DCM are as below:
clipboard Three Steps to Create a Project:
-
Project setup: provide a project name and base details and set up users.
-
Create a network (VPN link) for the project.
-
Site setup and Calibration of cameras.
The first two steps need to be completed as normal. DCM will send each project administrator the details of their user account. That user can create and configure new projects. The DCM team may assist with this.
Creating an API connection to your VMS system can help with the third step.
Creating an API link
Once a VPN link is established, you can optionally set up an API link to your VMS software. You will need valid user credentials for the local VMS system. If API users do not already exist, your VMS administrator may need to create them. You will also need the URL of the VMS API. Again, if not already enabled, you may need your VMS administrator to set up the API feature for your specific VMS system.
With these details noted, you can create the link from the DCM dashboard.
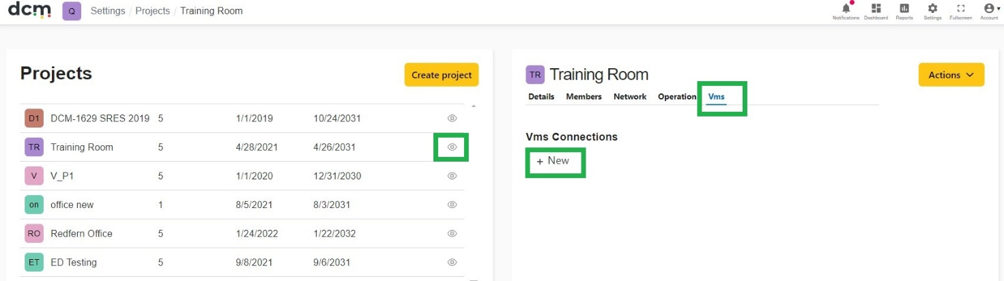
Adding a VMS link can be done from the Projects page.
Left Click the eye Icon next to the project you wish to link to your VMS.
This will open the project details panel.
Select the “VMS” tab at the top and then click “+ New” under VMS Connections – as highlighted in green below.
This will open the “Add VMS” details panel.
The VMS name is simply a text label to identify it within DCM. This label will appear in camera configuration screens. It can be any text, but in general its best to avoid special characters in your name other than underscores or dashes.
Choose the VMS type from the dropdown list.
Note that your VMS may be a rebranded OEM version of a supported VMS as noted in the previous section.
If your VMS type or an equivalent is not listed, consult the DCM team. Even if you cannot get the extra conveniences offered by an API connection, base DCM functionality can still be used with all VMS types that support the ONVIF standard.
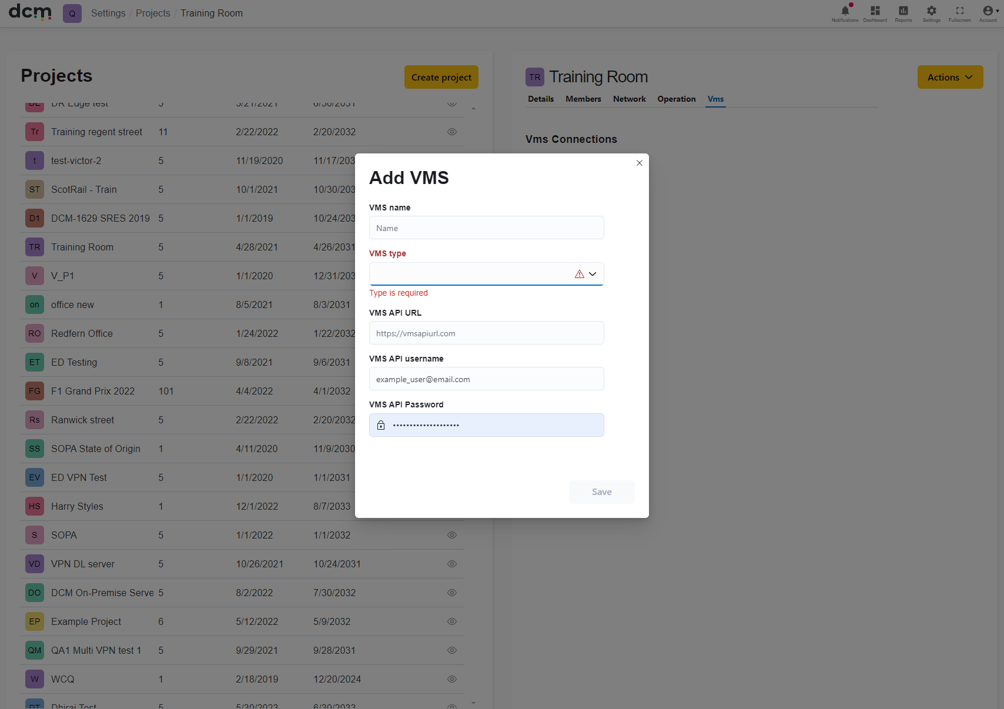
Enter the VMS API URL and user credentials you noted earlier, and press save.
Your VPN link should now be established. To test it we can set up a camera managed by the VMS system in DCM.
With the VPN and API links established, the DCM system will now be aware of all the cameras available from your VMS system.
Unlike a VMS system – DCM maps its data onto an overhead view of your site. To do this, it will still need details of where your cameras are, via the site map and zones.
Setting up each camera in DCM will still require most of the steps as detailed in the main manual “Camera set up and Calibration” section. But the Deployment step will be easier as details will be filled in for you.
Recall that cameras in DCM are set up using a hierarchy.
Site > Zone > Deployment > Calibration
After creating a site and zone, the user will create a Deployment to enter camera details.
Normally the user needs to select the camera type here. But with a VMS API connection established, a new option is available. The user can choose the VMS name (entered earlier) at this point instead.
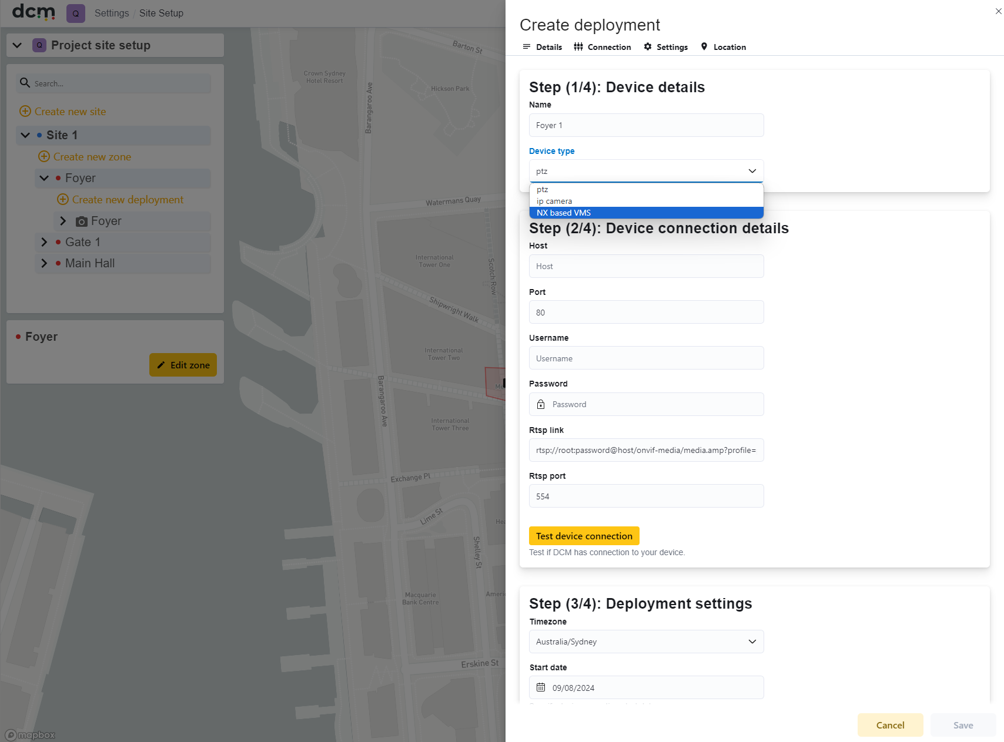
The camera can then be selected from a dropdown list of all cameras managed by the VMS system as below. The only manual entry now required is to give the deployment a name, select the desired camera from the list provided by the VMS system and mark its rough location.
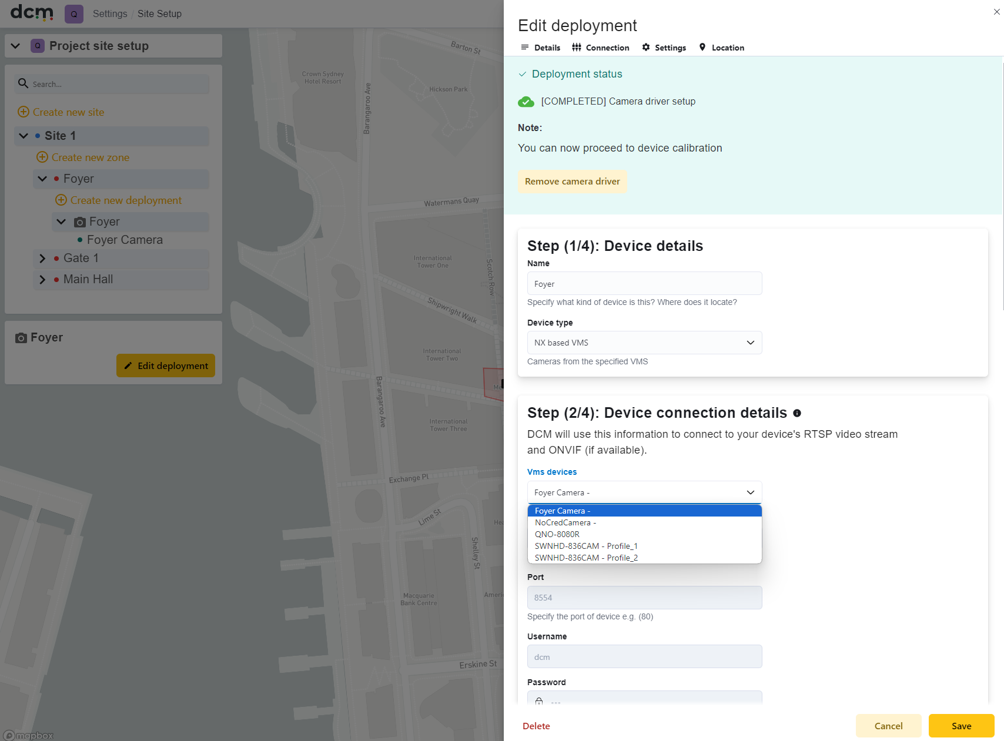
The name you provide is used in other parts of DCM to identify that camera such as when creating Alarms. While it can be any text, it is often advisable to use the same or similar label for that camera in both the source VMS and DCM to make navigating easier and make it clear which camera from the VMS is associated with which DCM zone.
Once selected, the IP address, RTSP URL, ports and credentials for the camera are automatically populated, without the user needing to know them.
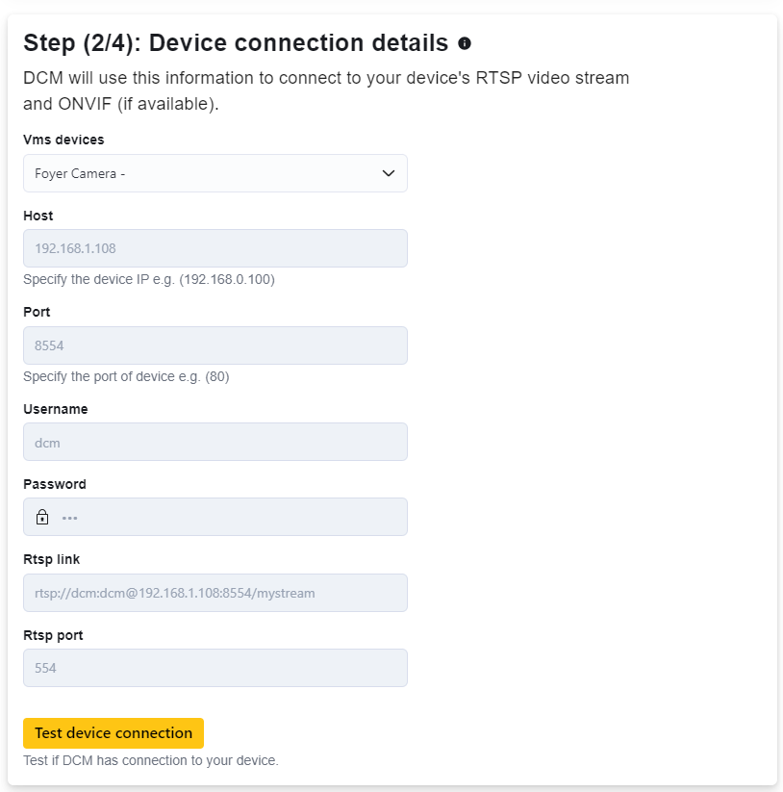
The link can still be tested, but details cannot be entered incorrectly provided the camera is operational within the VMS itself.
The user still needs to know the approximate location of the camera and mark it on the map in the next section. After that you can press save.
The next calibration step is unchanged and still needs to be done as detailed in the main user manual section titled “Camera set up and Calibration”.
Once configured the camera from the VMS system will appear in the DCM dashboard like any other camera.
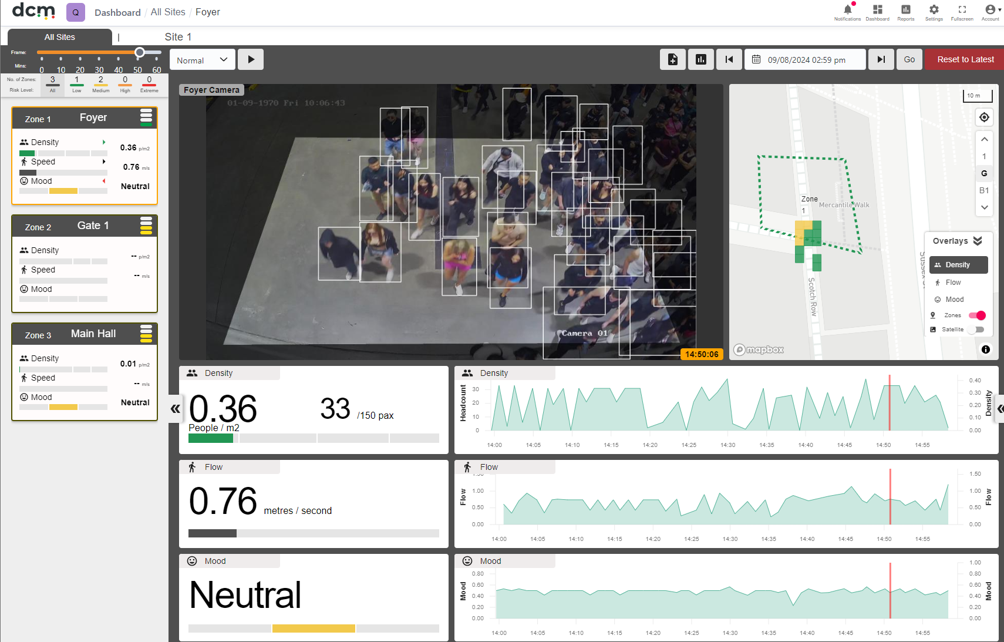
You can freely mix cameras from more than one VMS, or cameras from a VMS and cameras from other sources such as a direct connection within the same project, or even the same DCM zone.